
Pain points & high-frequency scenarios
What renters actually struggle with
- Wall penetration is required for the lineset + drain + electrical whip — every mini split (DIY or standard) needs a hole through the exterior wall, and many renters have landlords who won’t allow any wall modification
- Refrigerant lineset length is fixed and unit-specific (11.5-25 ft) — outdoor compressor must sit close to the indoor head, which dictates wall-penetration placement and rules out long attic runs
- DIY mini splits cost 10-15% more than standard splits ($1,200-$3,700 vs $800-$1,500) because of the pre-charged lineset and quick-connect fittings — buyers pay a unit premium to skip the $1,500-$3,000 pro install fee
- Wattage varies widely across 115V mini splits — the MRCOOL DIY 12k pulls 2,300W (~20A) and needs a dedicated 20A circuit; renters without a dedicated outlet may need an electrician ($200-$500) before installing
- Single-zone DIY mini splits only cool/heat one room — multi-room coverage requires a multi-zone unit ($3,000-$8,800) or multiple single-zone systems, both with diminishing returns per zone
When this category gets bought
- Studio or 1BR renter, can’t modify central HVAC, single-zone 9k-12k BTU MRCOOL DIY through a wall sleeve
- Trigger: Year-round climate control, ≤550 sqft studio or 1BR, 115V standard outlet, ≤ $1,800 budget
- For: Renters in mild-to-hot climates without central AC
- Pairs with: apartment-air-quality, small-apartment
- Garage or workshop conversion, 115V only, MRCOOL DIY Select 9,000 BTU on a standard household outlet
- Trigger: Garage/workshop not on central HVAC, 500-1,200 sqft, ≤ $1,500 budget
- For: Hobbyist renters converting a non-climate space
- Pairs with: storage-no-drill, kitchen-renter
- Sunroom or add-on room, dedicated cooling without extending central AC, ROVSUN 9k BTU pre-charged kit
- Trigger: Sunroom or single add-on room, $379 budget, 115V standard outlet
- For: Renters with a glassed-in add-on
- Pairs with: apartment-air-quality, decor-portable
Choosing a DIY mini split
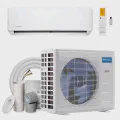
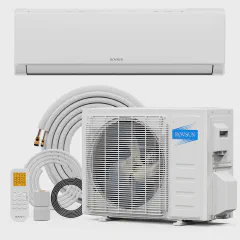
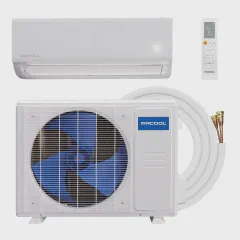
- Brand tier matters. MRCOOL invented the DIY mini split category and still ships the most complete kit (pre-charged lineset, quick-connect, mounting hardware). Pioneer and Blueridge match the pre-charged concept at lower price but fewer BTU options. Della is budget — simpler controls, shorter warranty.
- Voltage is the key filter. All three picks in this category are 115V/120V (standard US household outlet). Higher-BTU DIY units (18k+) sometimes require 230V — check the tech specs on the model page before buying. Wattage runs the spectrum: MRCOOL DIY 12k pulls 2,300W (highest), ROVSUN 9k pulls 840W, MRCOOL DIY Select 9k pulls 240W — bigger BTU draws more current.
- Lineset length is fixed and unit-specific. MRCOOL DIY 12k ships with a 25ft pre-charged install kit; MRCOOL DIY Select 9k ships with an 11.5ft pre-charged line set; ROVSUN’s kit size isn’t listed on the tech spec. Measure the run from outdoor compressor pad to indoor head location before ordering. Cutting or extending a pre-charged lineset voids the refrigerant seal and the warranty.
- Wall penetration is required and the size is well-documented. Every mini split (DIY or standard) needs a hole through the exterior wall for the lineset + drain + electrical whip. Standard size for DIY mini splits is 3" (per Home Depot how-to guide and installer consensus); the MRCOOL DIY 5th Gen specifically uses a 3.5" hole per the official Ingrams Water & Air installation video. This is the one step that requires landlord approval for renters; budget $50-$100 for a move-out patch.
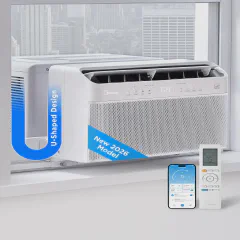
- Window-portable is the no-permit fallback. Zero Breeze Mark 2 and BougeRV portable ACs cool 100-200 sqft on a standard outlet, no install, fully removable. Trade-off: 50-70 dB noise and 30-40% efficiency loss vs. a real mini split. Best for renters with strict leases or sublets where wall work isn’t an option.
How to install a DIY mini split yourself
This is what makes DIY mini splits different from standard splits — the install is the product.
What you’re actually doing
- Mount indoor head. Wall bracket, level, 6-8 inches from ceiling so the airflow throws across the room instead of down the wall. Most brands include a paper template; tape it to the wall, drill the anchor points, bolt the bracket on.
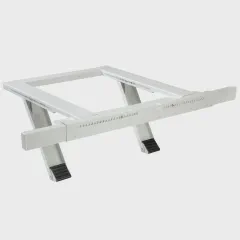
- Mount outdoor compressor. Concrete pad or wall mount, away from bedroom windows (50-65 dB at 3 ft). Pad install: pour a quick-set concrete pad (
$30) or use a pre-cast pad ($40). Wall mount: heavy-duty L-bracket rated for 80+ lb compressor. - Drill the wall penetration. All mini splits need a hole through the exterior wall for the lineset, condensate drain, and electrical whip. Standard DIY size is 3"; the MRCOOL DIY 5th Gen specifically takes a 3.5" hole per the official installation video. Most DIY kits bundle a wall sleeve sized to the lineset — buy the hole saw to match (3" or 3.5" hole saw, ~$25). Total wall thickness is typically ~6 inches (vinyl siding + sheathing + drywall). The hole is sealed with exterior caulk and capped with a plastic escutcheon plate. This is the one step that requires landlord approval for renters.
- Connect lineset and electrical. Run the pre-charged lineset through the sleeve, snap the quick-connect fittings on both ends (hand-tighten + quarter turn with a wrench, no gauges needed). Run the electrical whip from the disconnect box to the indoor head — these are 115V/120V units, so a standard household outlet works for the 9k models; the 12k MRCOOL DIY needs a dedicated 20A circuit. Wattage on the spec sheet tells you the amp draw (e.g. 2,300W ÷ 115V ≈ 20A).
- Power on and test. Flip the breaker, set the remote to cool, hold your hand in front of the indoor head. Cold air within 2-3 minutes = install successful. No vacuum pump, no manifold gauges, no EPA 608 cert — the refrigerant is sealed in the lineset at the factory.
Time and tools
- Time: 2-4 hours for first-timer with a helper, 1-2 hours for someone who’s installed one before. The slowest step is drilling the wall sleeve (5-10 min for the hole + sealing).
- Tools needed: Hole saw sized to your kit — 3" for most DIY mini splits, 3.5" for MRCOOL DIY 5th Gen (per the official installation video); drill (corded, 1/2-inch chuck for these large hole saws), level, wrench set, screwdriver set, electrical supplies (wire nuts, disconnect box if not included), exterior caulk, ladder. No HVAC specialty tools.
- Helper: yes, the indoor head is awkward to hold on the wall bracket solo; one person holds, one person marks the drill points. After mounting, one person can finish alone.
Cost vs. pro install
- DIY install cost: $0 (tools you likely have, lineset/whip included with unit).
- Pro install cost: $1,500-$3,000 for a single-zone unit, mostly labor (vacuum pump + manifold gauges + EPA 608 cert + refrigerant top-up if any leaks). Pro install also typically adds 2-4 hours to the project timeline.
- The trade-off: DIY mini split costs 10-15% more than a standard split ($1,200-$3,700 vs $800-$1,500 for comparable BTU) to cover the pre-charged lineset and quick-connect fittings. You pay a unit premium to skip the pro install fee — net savings are usually $500-$2,000 per install.
When NOT to DIY
- Multi-zone systems (3+ indoor heads). Each zone adds a lineset run; vacuum-pump work becomes substantial. Pro install pays for itself here.
- Long lineset runs (>25 ft). Pre-charged linesets top out at 25 ft for DIY brands; longer runs need a pro to vacuum and charge.
- Local code requires a licensed HVAC tech. Some jurisdictions (rare, but NYC, parts of California) require EPA 608 certification for any refrigerant work. DIY install with pre-charged linesets technically avoids this, but a strict inspector might still flag it. Check local code first.
- You’re not comfortable with electrical work. The panel-side wiring for the dedicated breaker is the riskiest step for the 12k DIY (draws ~20A at 115V). An electrician handles the panel work for $200-$500; you do the rest of the install.